
티스토리 뷰
Ruby on Rails : DB 백업하기 (PostgresDB 기준 설명) [Gem : backup, whenever]
나른한 하루 2019. 12. 5. 04:04해당 글은 https://blog.naver.com/kbs4674/221212397227 로 부터 게시글이 이전되었습니다.
우리는 갑작스러운 상황에 대비(어떤 자료가 필요한데 지금은 소멸되었으나 n일전 DB에는 남겨져 있을 때, 갑작스러운 사이트 해킹, 롤백)를 위해 자료를 백업을 해야 할 필요성이 있습니다.
이번 시간에는 DB를 자동적으로 백업을 설명하고자 합니다.
다만, 제가 사용하는 DB가 PostgreSQL 이다 보니 기본적으로 사용되는 SQLite3가 아닌 PostgreSQL 기준으로 설명하겠습니다.
참고
1) 이 기능은 PostgreSQL DB 기준으로 설명합니다.
2) 예약된 시간에 따라 자동으로 일 처리를 하는 whenever Gem이 선택적으로 필요합니다.
※ 자동 일처리 : whenever [클릭]
3) AWS S3 저장소가 필요할 수 있는 Gem입니다.
※ AWS S3 Amazon 사이트 내에서의 준비 및 AWS S3 생성하기 [클릭]
※ AWS S3 셋팅 과정이 이미 진행 되었다는 가정 하에 설명합니다.
4) 리눅스 지식이 있으면 좋습니다.
백업된 자료는 AWS S3 혹은 Local에 저장하는 방법 중 하나, 혹은 둘 다 선택할 수 있습니다.
선택은 여러분들 몫 입니다.
Chapter 1 자료 백업 : backup 공통적인 과정 (local, AWS S3)
Gemfile 에 다음 내용을 입력합니다.
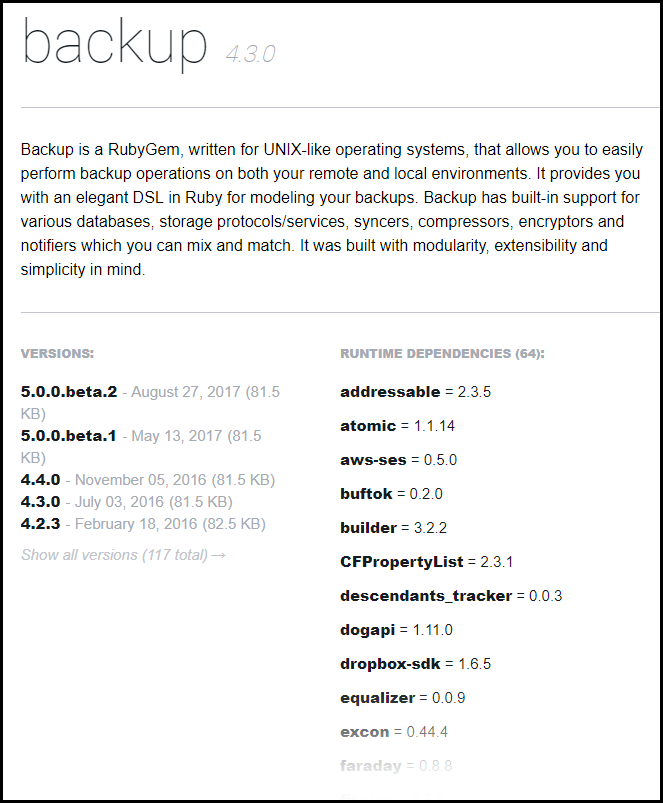
gem 'backup', '~> 5.0.0.beta.2'그리고 Gem을 설치해주세요.
bundle install참고 단순히 gem 'backup' 만 쓰지 말고 반드시 gem 'backup', '~> 5.0.0.beta.2' 와 같이 버전을 언급해서 써주셔야 합니다.
gem 'backup' 만 쓰면 옛날 버전 Gem이 설치되고, 다음 과정 진행이 안됩니다.
Chapter 2 - 선택 1 자료 백업 : backup (AWS S3 연동)
참고
1) AWS S3 저장소가 필요합니다.
※ AWS S3 Amazon 사이트 내에서의 준비 및 AWS S3 생성하기 [클릭]
1. 터미널에 다음 내용을 입력합니다.
# backup generate:model --trigger [백업 파일 명] --databases="postgresql" --storages="s3" --compressor="gzip" --notifiers="mail"
backup generate:model --trigger weekly_db_backup --databases="postgresql" --storages="s3" --compressor="gzip" --notifiers="mail"
1) 백업되는 파일명 : weekly_backup
2) 백업될 DB : PostgreDB
3) 백업될 DB가 저장될 곳 : AWS S3
4) 압축 : gzip
5) 백업 후 알림 : 이메일
위 내용을 입력하면

위 사진과 같이 Backup 모델파일 생성과 함께 파일 위치를 알려줍니다. (파일 생성 위치는 사람마다 다를 수 있습니다.)
백업 파일이 생성된 위치로 가서, weekly_db_backup.rb 파일을 열람합니다.
2. weekly_db_backup.rb 파일을 열람하면 다음과 같은 내용이 보여집니다.
# encoding: utf-8

##
# Backup Generated: weekly_db_backup
# Once configured, you can run the backup with the following command:
#
# $ backup perform -t weekly_db_backup [-c <path_to_configuration_file>]
#
# For more information about Backup's components, see the documentation at:
# http://backup.github.io/backup
#
Model.new(:weekly_db_backup, 'Description for weekly_db_backup') do

  ##
  # PostgreSQL [Database]
  #
  database PostgreSQL do |db|
    # To dump all databases, set `db.name = :all` (or leave blank)
    db.name               = "my_database_name"
    db.username           = "my_username"
    db.password           = "my_password"
    db.host               = "localhost"
    db.port               = 5432
    db.socket             = "/tmp/pg.sock"
    # When dumping all databases, `skip_tables` and `only_tables` are ignored.
    db.skip_tables        = ["skip", "these", "tables"]
    db.only_tables        = ["only", "these", "tables"]
    db.additional_options = ["-xc", "-E=utf8"]
  end

  ##
  # Amazon Simple Storage Service [Storage]
  #
  store_with S3 do |s3|
    # AWS Credentials
    s3.access_key_id     = "my_access_key_id"
    s3.secret_access_key = "my_secret_access_key"
    # Or, to use a IAM Profile:
    # s3.use_iam_profile = true

    s3.region            = "us-east-1"
    s3.bucket            = "bucket-name"
    s3.path              = "path/to/backups"
    s3.keep              = 5
    # s3.keep              = Time.now - 2592000 # Remove all backups older than 1 month.
  end

  ##
  # Gzip [Compressor]
  #
  compress_with Gzip

  ##
  # Mail [Notifier]
  #
  # The default delivery method for Mail Notifiers is 'SMTP'.
  # See the documentation for other delivery options.
  #
  notify_by Mail do |mail|
    mail.on_success           = true
    mail.on_warning           = true
    mail.on_failure           = true

    mail.from                 = "sender@email.com"
    mail.to                   = "receiver@email.com"
    mail.cc                   = "cc@email.com"
    mail.bcc                  = "bcc@email.com"
    mail.reply_to             = "reply_to@email.com"
    mail.address              = "smtp.gmail.com"
    mail.port                 = 587
    mail.domain               = "your.host.name"
    mail.user_name            = "sender@email.com"
    mail.password             = "my_password"
    mail.authentication       = "plain"
    mail.encryption           = :starttls
  end

end
우리는 위 원래의 내용을 다음과 같이 수정할겁니다.
# encoding: utf-8

##
# Backup Generated: weekly_db_backup
# Once configured, you can run the backup with the following command:
#
# $ backup perform -t weekly_db_backup [-c <path_to_configuration_file>]
#
# For more information about Backup's components, see the documentation at:
# http://backup.github.io/backup
#
Model.new(:weekly_db_backup, '[메일 보낼 때 쓰여질 제목 및 내용]') do

  ##
  # PostgreSQL [Database]
  #
  database PostgreSQL do |db|
    # To dump all databases, set `db.name = :all` (or leave blank)
    db.name               = "[내 DB 이름]_production"
    db.username           = "[DB 계정 아이디]"
    db.password           = "[DB 계정 암호]"
    db.host               = "localhost"
  end

  ##
  # Amazon Simple Storage Service [Storage]
  #
  store_with S3 do |s3|
    # AWS Credentials
    s3.access_key_id     = "[AWS S3 키 아이디]"
    s3.secret_access_key = "[AWS S3 키 암호]"
    # Or, to use a IAM Profile:
    # s3.use_iam_profile = true

    s3.region            = "ap-northeast-2"
    s3.bucket            = "[S3 버킷 이름]"
    s3.path              = "pg_db_backup/"
    s3.keep              = 5
    # s3.keep              = Time.now - 2592000 # Remove all backups older than 1 month.
  end

  ##
  # Gzip [Compressor]
  #
  compress_with Gzip

  ##
  # Mail [Notifier]
  #
  # The default delivery method for Mail Notifiers is 'SMTP'.
  # See the documentation for other delivery options.
  #
  notify_by Mail do |mail|
    mail.on_success           = true
    mail.on_warning           = true
    mail.on_failure           = true

    mail.from                 = "[보내는 사람]"
    mail.to                   = "[받는 사람]"
    mail.cc                   = "[아마 구독자1로 추정됨..(저는 세컨 구독자는 딱히 없어서 받는사람과 동일하게 입력함.)]"
    mail.bcc                  = "[아마 구독자2로 추정됨..(저는 세컨 구독자는 딱히 없어서 받는사람과 동일하게 입력함.)]"
    mail.reply_to             = "reply_to@email.com"
    mail.address              = "smtp.gmail.com"
    mail.port                 = 587
    mail.domain               = "localhost"
    mail.user_name            = "[보내는 사람]"
    mail.password             = "[보내는 사람 메일 암호]"
    mail.authentication       = "plain"
    mail.encryption           = :starttls
  end

end
자신에게 맞게 내용을 작성해주고, 저장해 주세요.
참고 원래 여기다가 Figaro Gem(코드 보안)을 활용하려고 했는데, 적용이 안되더라고요..
보안 이슈 관련해서는 좀 더 연구해보겠습니다.
3. /(자신의 프로젝트) 디렉토리로 돌아갑니다.
4. 터미널에 다음 명령어를 입력해주세요.
backup check

위와같이 결과가 떳다면 잘 된겁니다^^
5. 터미널에 다음 명령어를 입력해주세요.
# backup perform --trigger [백업 파일 명]
backup perform --trigger weekly_db_backup
참고 혹시 백업되는 파일 이름을 'weekly_db_backup'이라고 안하셨다면, 다른 이름으로 바꿔주세요.
위 명령어를 입력하면
아래와 같이 DB가 백업이 되고, 압축파일로 저장되고, S3에 저장되는 작업이 보여집니다!

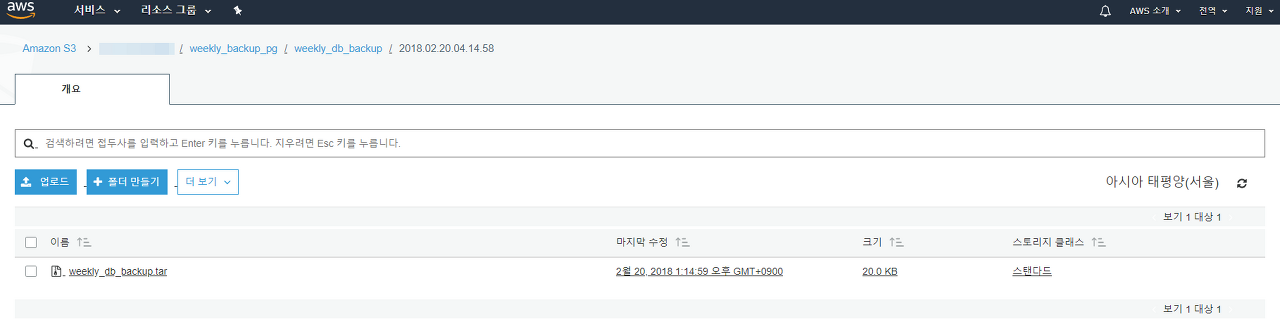

AWS 및 메일로도 무사히 도착한게 확인됩니다.
이로서 DB 백업 기반은 끝났습니다.
참고 백업 자료는 최대 5개까지 쌓입니다. (5개를 초과해버리면 먼저 생성된 백업파일 순으로 삭제됨.)
Chapter 2 - 선택 2 자료 백업 : backup (로컬 저장 방식)
1. 터미널에 다음 내용을 입력합니다.
# backup generate:model --trigger [백업 파일 명] --databases="postgresql" --storages="local" --compressor="gzip" --notifiers="mail"
backup generate:model --trigger weekly_db_backup --databases="postgresql" --storages="local" --compressor="gzip" --notifiers="mail"
1) 백업되는 파일명 : weekly_backup
2) 백업될 DB : PostgreDB
3) 백업될 DB가 저장될 곳 : 로컬
4) 압축 : gzip
5) 백업 후 알림 : 이메일
위 내용을 입력하면

위 사진과 같이 Backup 모델파일 생성과 함께 파일 위치를 알려줍니다. (파일 생성 위치는 사람마다 다를 수 있습니다.)
model 파일이 생성된 위치로 가서, weekly_db_backup.rb 파일을 열람합니다.
2. weekly_db_backup.rb 파일을 열람하면 다음과 같은 내용이 보여집니다.
# encoding: utf-8

##
# Backup Generated: weekly_db_backup
# Once configured, you can run the backup with the following command:
#
# $ backup perform -t weekly_db_backup [-c <path_to_configuration_file>]
#
# For more information about Backup's components, see the documentation at:
# http://backup.github.io/backup
#
Model.new(:weekly_db_backup, 'Description for weekly_db_backup') do

  ##
  # PostgreSQL [Database]
  #
  database PostgreSQL do |db|
    # To dump all databases, set `db.name = :all` (or leave blank)
    db.name               = "my_database_name"
    db.username           = "my_username"
    db.password           = "my_password"
    db.host               = "localhost"
    db.port               = 5432
    db.socket             = "/tmp/pg.sock"
    # When dumping all databases, `skip_tables` and `only_tables` are ignored.
    db.skip_tables        = ["skip", "these", "tables"]
    db.only_tables        = ["only", "these", "tables"]
    db.additional_options = ["-xc", "-E=utf8"]
  end

  ##
  # Local (Copy) [Storage]
  #
  store_with Local do |local|
    local.path       = "~/backups/"
    local.keep       = 5
    # local.keep       = Time.now - 2592000 # Remove all backups older than 1 month.
  end

  ##
  # Gzip [Compressor]
  #
  compress_with Gzip

  ##
  # Mail [Notifier]
  #
  # The default delivery method for Mail Notifiers is 'SMTP'.
  # See the documentation for other delivery options.
  #
  notify_by Mail do |mail|
    mail.on_success           = true
    mail.on_warning           = true
    mail.on_failure           = true

    mail.from                 = "sender@email.com"
    mail.to                   = "receiver@email.com"
    mail.cc                   = "cc@email.com"
    mail.bcc                  = "bcc@email.com"
    mail.reply_to             = "reply_to@email.com"
    mail.address              = "smtp.gmail.com"
    mail.port                 = 587
    mail.domain               = "your.host.name"
    mail.user_name            = "sender@email.com"
    mail.password             = "my_password"
    mail.authentication       = "plain"
    mail.encryption           = :starttls
  end

end
우리는 위 원래의 내용을 다음과 같이 수정할겁니다.
# encoding: utf-8

##
# Backup Generated: weekly_db_backup
# Once configured, you can run the backup with the following command:
#
# $ backup perform -t weekly_db_backup [-c <path_to_configuration_file>]
#
# For more information about Backup's components, see the documentation at:
# http://backup.github.io/backup
#
Model.new(:weekly_db_backup, '(메일 보낼 때 쓰여질 제목 및 내용)') do

  ##
  # PostgreSQL [Database]
  #
  database PostgreSQL do |db|
    # To dump all databases, set `db.name = :all` (or leave blank)
    db.name               = "[내 DB 이름]_production"
    db.username           = "[DB 계정 아이디]"
    db.password           = "[DB 계정 암호]"
    db.host               = "localhost"
  end

  ##
  # Local (Copy) [Storage]
  #
  store_with Local do |local|
    local.path       = "[DB파일이 저장될 위치]" # (예시) : /(프로젝트 명)
    local.keep       = 5
    # local.keep       = Time.now - 2592000 # Remove all backups older than 1 month.
  end

  ##
  # Gzip [Compressor]
  #
  compress_with Gzip

  ##
  # Mail [Notifier]
  #
  # The default delivery method for Mail Notifiers is 'SMTP'.
  # See the documentation for other delivery options.
  #
  notify_by Mail do |mail|
    mail.on_success           = true
    mail.on_warning           = true
    mail.on_failure           = true

    mail.from                 = "[보내는 사람]"
    mail.to                   = "[받는 사람]"
    mail.cc                   = "[아마 구독자1로 추정됨..(저는 세컨 구독자는 딱히 없어서 받는사람과 동일하게 입력함.)]"
    mail.bcc                  = "[아마 구독자2로 추정됨..(저는 세컨 구독자는 딱히 없어서 받는사람과 동일하게 입력함.)]"
    mail.reply_to             = "reply_to@email.com"
    mail.address              = "smtp.gmail.com"
    mail.port                 = 587
    mail.domain               = "localhost"
    mail.user_name            = "[보내는 사람]"
    mail.password             = "[보내는 사람 메일 암호]"
    mail.authentication       = "plain"
    mail.encryption           = :starttls
  end

end
자신에게 맞게 내용을 작성해주고, 저장해 주세요.
참고 원래 여기다가 Figaro Gem(코드 보안)을 활용하려고 했는데, 적용이 안되더라고요..
보안 이슈 관련해서는 좀 더 연구해보겠습니다.
3. /(자신의 프로젝트) 디렉토리로 돌아갑니다.
4. 터미널에 다음 명령어를 입력해주세요.
backup check위와같이 결과가 떳다면 잘 된겁니다^^
5. 터미널에 다음 명령어를 입력해주세요.
# backup perform --trigger [백업 파일 명]
backup perform --trigger weekly_db_backup
참고 혹시 백업되는 파일 이름을 'weekly_db_backup'이라고 안하셨다면, 다른 이름으로 바꿔주세요.
위 명령어를 입력하면
아래와 같이 DB가 백업이 되고, 압축파일로 저장되고, 로컬에 저장되는 작업이 보여집니다!

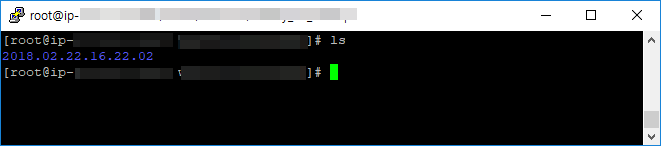
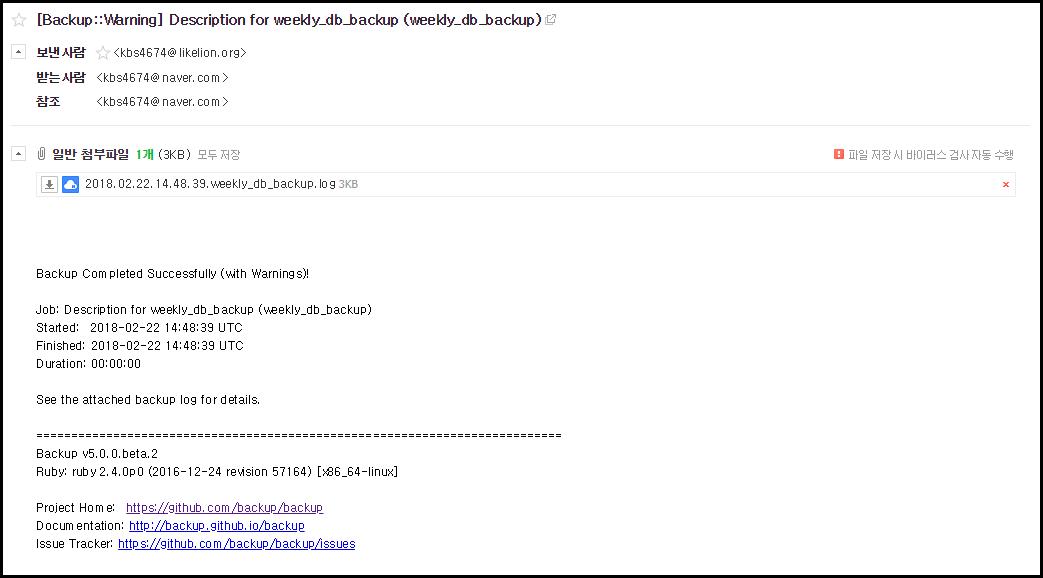
로컬 및 메일로도 무사히 도착한게 확인됩니다.
이로서 DB 백업 기반은 끝났습니다.
참고 백업 자료는 최대 5개까지 쌓입니다. (5개를 초과해버리면 먼저 생성된 백업파일 순으로 삭제됨.)
Chapter 3 자동 일처리 : whenever
참고
1) 이 기능은 whenever Gem 사용지식이 필요합니다.
※ 자동 일처리 : whenever [클릭]
2) whenever Gem에 대한 자세한 설명은 생략합니다.
1. Gemfile 로 이동하시고, 다음 내용을 입력해서 새로운 Gem을 설치합니다.
gem 'whenever'
2. 프로젝트 상단 위치 /(자신의 프로젝트 위치) 에서 다음 명령어를 입력해줍니다.
wheneverize .위 명령어를 입력하면 config 디렉토리에 schedule.rb 라는 파일이 생성된 것을 확인하실 수 있습니다.
3. config/schedule.rb 파일을 열람하여, 다음 내용을 (추가) 입력해 줍니다.
every 7.weeks, :at => '4:50 am' do
    command "cd (프로젝트 절대주소);backup perform --trigger (백업 파일 명)"
end
위와같이 입력을 해주면 되는데, 프로젝트 절대주소 같은 경우는
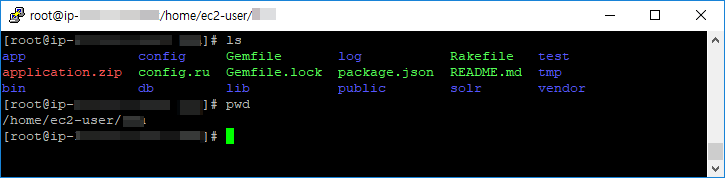
프로젝트 디렉토리 상단(Gemfile, config, app, db 등 파일이 있는 곳)에서 터미널에
pwd를 입력하면 알 수 있습니다.
예시로 저는 아래와 같이 입력했습니다.
every 7.weeks, :at => '4:50 am' do
    command "cd /home/ec2-user/(프로젝트 명);backup perform --trigger weekly_db_backup"
end
참고 저는 매 주 새벽 4시 50분에 command 명령어에 적어놓은 작업이 진행되도록 설정했습니다.
4. 3번 과정의 내용이 담긴 파일을 저장하고 나간 뒤, /(자기 프로젝트) 로 꼭 이동하신 후 터미널에 다음 내용을 입력해서
sudo service cron restartwhenever 설정을 최신화 합니다.
위와같은 과정을 거쳐서 설정을 하면 스케쥴러에 설정한 대로 DB가 1주일 단위로 자동으로 DB가 백업이 되고, DB가 백업되면 메일알림이 옵니다.
Chapter 4 백업된 자료를 이용하여 DB 복원하기 (Restore)
1. Database Create 까지의 과정을 해줍니다.
rake db:drop:all
rake db:create:all
2. 백업된 DB 파일의 압축을 완전히 풀어주세요. (PostgreSQL.sql 파일이 나올 때 까지.)
#tar 확장자 압축 해제
tar -xvf ./(파일 명)

#gzip 확장자 압축 해제
gzip -d ./(파일 명)
3. ROLE 권한 설정을 진행합니다.

1) 먼저 PSQL 커멘드 모드로 들어갑니다.
sudo -u postgres psql
2) 다음 명령어를 입력해서 DB 계정에 권한을 부여합니다.
alter role [DB 계정 아이디] with superuser;
# => ALTER ROLE
4. PSQL 커멘드 모드를 빠져나갑니다. (Ctrl+D)
5. 터미널에 다음 명령어를 입력합니다.
psql -U [DB 계정 아이디] -d [DB 이름] < [sql 파일 절대위치]명칭 참고
# /(자신의 프로젝트)/config/database.yml
production:
  adapter: postgresql
  host: localhost
  encoding: utf8
  sslmode: allow
  database: [DB 이름]_production
  pool: 5
  username: [아이디]
  password: [암호]
과거 database.yml 파일에서 위 정보를 적으신게 기억나실겁니다.
- DB 아이디 : database.yml 에서 username 을 뜻하고,
- DB 이름 : database.yml 에서 database 를 뜻합니다.

6. migrate를 해주면 DB 복원이 완료됩니다!
## Production 기준

rake db:migrate RAILS_ENV=production
-
이슈 Dependency check

backup Gem 같은 경우는 다양한 Gem들에 의존을 하는 Gem입니다.
일단 기본적인 원인으로서는 의존되는 Gem 구성들 중 일부가 없다는 건데, 보통 웬만하면은 같이 깔립니다.
이러한 원인은 저같은 경우는 구형 backup Gem(3.x.x Ver.)을 사용해서 나타났었습니다.
* Chapter 1 에서 해당 부분에 대해 언급.
혹시 gem 'backup' 을 적어놓으셨다면, gem 'backup', '~> 5.0.0.beta.2' 로 변경해서 설치해보세요.
-
이슈 자료 백업 : TCP/IP Connections on port 5432?

해당 문제는 PostgreSQL DB가 꺼져있어서 그렇습니다.
저 같은 경우는 PG를 다시 키니 해결되었습니다.
sudo service postgresql95 restart
-
참고 Gem 도움말
backup Gem에 대한 도움말은 다음 명령어를 터미널에 입력해주시면 됩니다.
backup help generate:model
더불어, Backup Gem 사용에 대한 공식 문서도 있으니 참고해주시면 되겠습니다.
http://backup.github.io/backup/v4/installation/
-
자료 참고
1) AWS S3 백업 방법 [클릭]
2) 로컬저장&메일 알림 [클릭]
3) 명령어 오류 해결 [클릭]
4) Gem파일 작성 [클릭]
5) 복원 [클릭]
6) ERROR: must be owner of extension plpgsql 에러 [클릭]
'프로그래밍 공부 > Ruby on Rails : Gem' 카테고리의 다른 글
| Ruby on Rails : 가상 브라우저를 활용한 크롤링 [Gem : selenium-webdriver] (4) | 2019.12.05 |
|---|---|
| Ruby on Rails : Nokogiri 크롤링 [Gem : nokogiri] (0) | 2019.12.05 |
| Ruby on Rails : 선입선출 Background Job [Gem : sidekiq] (0) | 2019.12.03 |
| Ruby on Rails : 스케쥴링(예약된 시간) Background Job [Gem : Whenever] (0) | 2019.12.03 |
| Ruby on Rails : 중첩댓글 [Gem : act-as-commentable-with-threading] with Ajax 비동기 처리 (6) | 2019.11.05 |